Markdown & MDX
Overview
Markdown (.md) and MDX (.mdx) are two popular formats for authoring content. Tina works great with both formats, and provides a simple WYSIWYG editor (so your editors won't have to manually write any markup).

What is markdown?
A basic .md might look like this:
---title: This is my title---## Knock Knock!Who's there?
The fields registered in between the --- delimiters, are called your frontmatter. Anything below is your markdown body.
What is MDX?
MDX is similar to Markdown, however it adds the ability to write JSX components in your markdown body.
---title: This is my title---## Knock Knock!Who's there?<PunchLine text="orange your glad I didn't say banana?" />
Configuring the collection
To define a Tina collection that maps to a .md file, your schema might look like this:
const default defineConfig({// ...schema: {collections: [{label: 'Blog Posts',name: 'post',path: 'content/posts',format: 'md',fields: [{type: 'string',label: 'Title',name: 'title',},{type: 'rich-text',label: 'Post Body',name: 'body',isBody: true,},],},]}})
format, at the root of the collection, defines the filetype (mdin this case).- All the frontmatter fields can be registered, and assigned a type.
- Your markdown body is registered by defining a
rich-textfield, and settingisBody: true.
Rendering content with TinaMarkdown
When your markdown content is requested through Tina's API, Tina serves a parsed AST version of the content.
The parsed AST gives developers the ability to step through each node, and render it with full control.
Tina also provides a <TinaMarkdown> component, which renders your md or mdx component from the parsed AST.
Here's an example of fetching our markdown content, and rendering it on the page.
import { TinaMarkdown } from "tinacms/dist/rich-text";// server codeconst getStaticProps = () => {const post = await client.queries.post({ relativePath: 'HelloWorld.md' })return { data: { post: post } }}// Page componentconst MyBlogPost = (props) => {return (<><h1>{props.data.title}</h1><TinaMarkdown content={props.data.body} /></>)}
Providing "custom components" for MDX documents
If you are using mdx as the format, you'll have the ability to define custom components that your editors can leverage.

How does MDX work with Tina?Tina doesn't require a compilation step like other MDX tooling you might be familiar with, so it needs to know about all the possible elements you support ahead of time. Instead of doing animportstatement in MDX, you need to register each element as atemplatein your Tina schema.
Defining a "template" in a collection
Tina needs to have each MDX component defined in advance, in the tina/config.{ts,js,tsx} file.
export default defineConfig({// ...schema: {collections: [{label: 'Blog Posts',name: 'post',path: 'content/posts',- format: 'md',+ format: 'mdx',fields: [// ...{type: 'rich-text',label: 'Post Body',name: 'body',isBody: true,+ templates: [+ {+ name: "NewsletterSignup",+ label: "Newsletter Sign Up",+ fields: [+ {+ name: "children",+ label: "CTA",+ type: "rich-text",+ },+ {+ name: "buttonText",+ label: "Button Text",+ type: "string",+ }+ ],+ },+ ],},],},],}})
By defining the above NewsletterSignup template, our editors now have the ability to add that template to the page body.

Saving a document would output a component in the markdown body that looks like this:
//...<NewsletterSignup buttonText="Submit">### Hello world</NewsletterSignup>
Registering a "component" with TinaMarkdown
Once you've registered a template with a rich-text field in a collection, Tina still needs to know how to render the custom component.
Custom components can be defined with the components prop on <TinaMarkdown>.
const components = {// The "NewsletterSignup" key maps to a "template" defined// on our "rich-text" fieldNewsletterSignup: (props) => {return (<><div><TinaMarkdown content={props.children} /></div><div><form><label htmlFor="email-address">Email address</label><input name="email-address" type="email" required /><button type="submit">{props.buttonText}</button></form></div></>)},}const MyBlogPost = (props) => {return (<><h1>{props.data.title}</h1><TinaMarkdown content={props.data.body} components={components} /></>)}
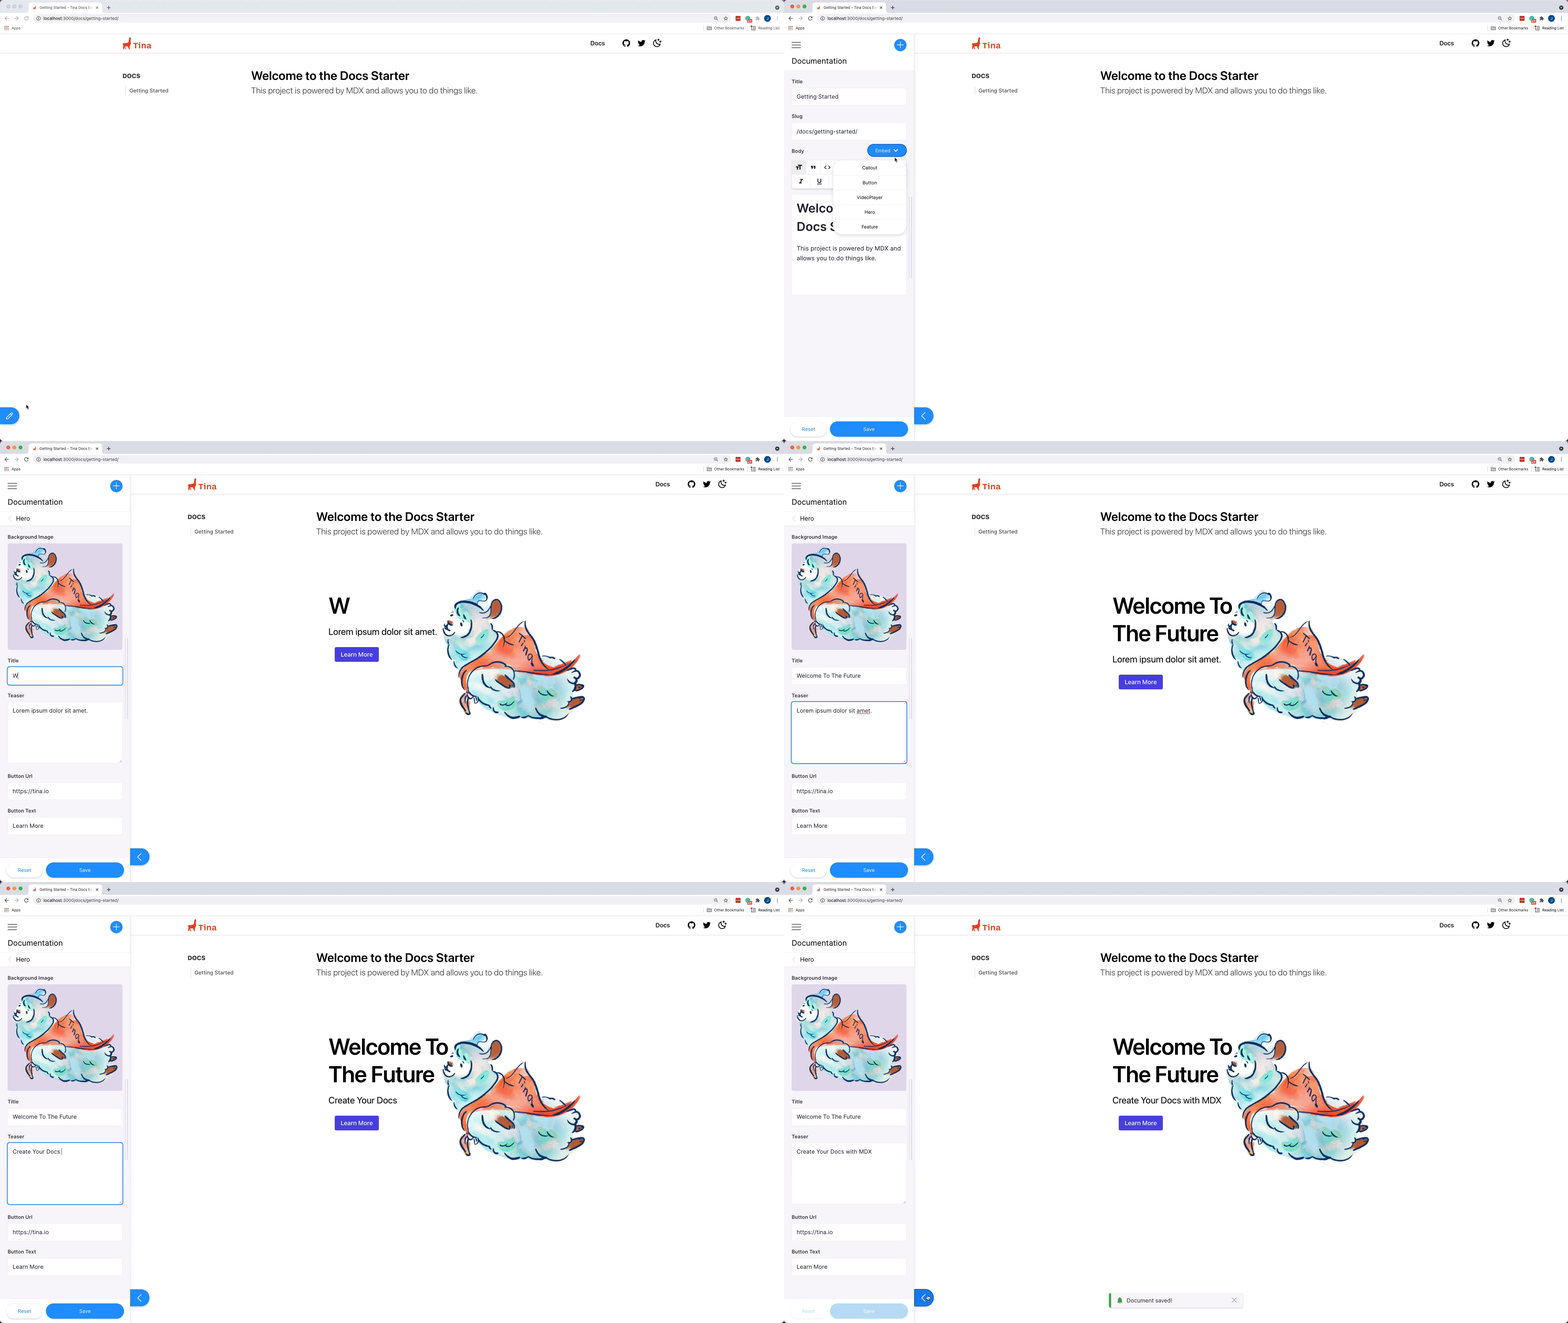
Once our custom component has been registered with TinaMarkdown, editors can easily add components, and immediately see them rendered on the page.

Reference
For full usage details, check out the rich-text reference documentation.
Editing with Tina
Block-based editing
Product
Resources
Whats New
Use Cases
Benefits
Comparisons
Integrations
© TinaCMS 2019–2024